To take screenshots, Windows and Vista users use their Snipping Tool. The Snipping Tool lets you take a screenshot of a specific area of the screen. It is available by default on Windows 7, Windows 8.1 and Windows 10.
- To open the program, type “Snipping Tool” in the search box.
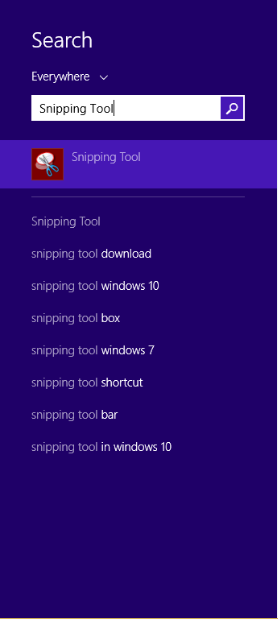
- Click on the tool in the suggestions to open it. A window will pop up.
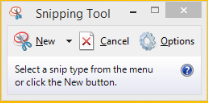
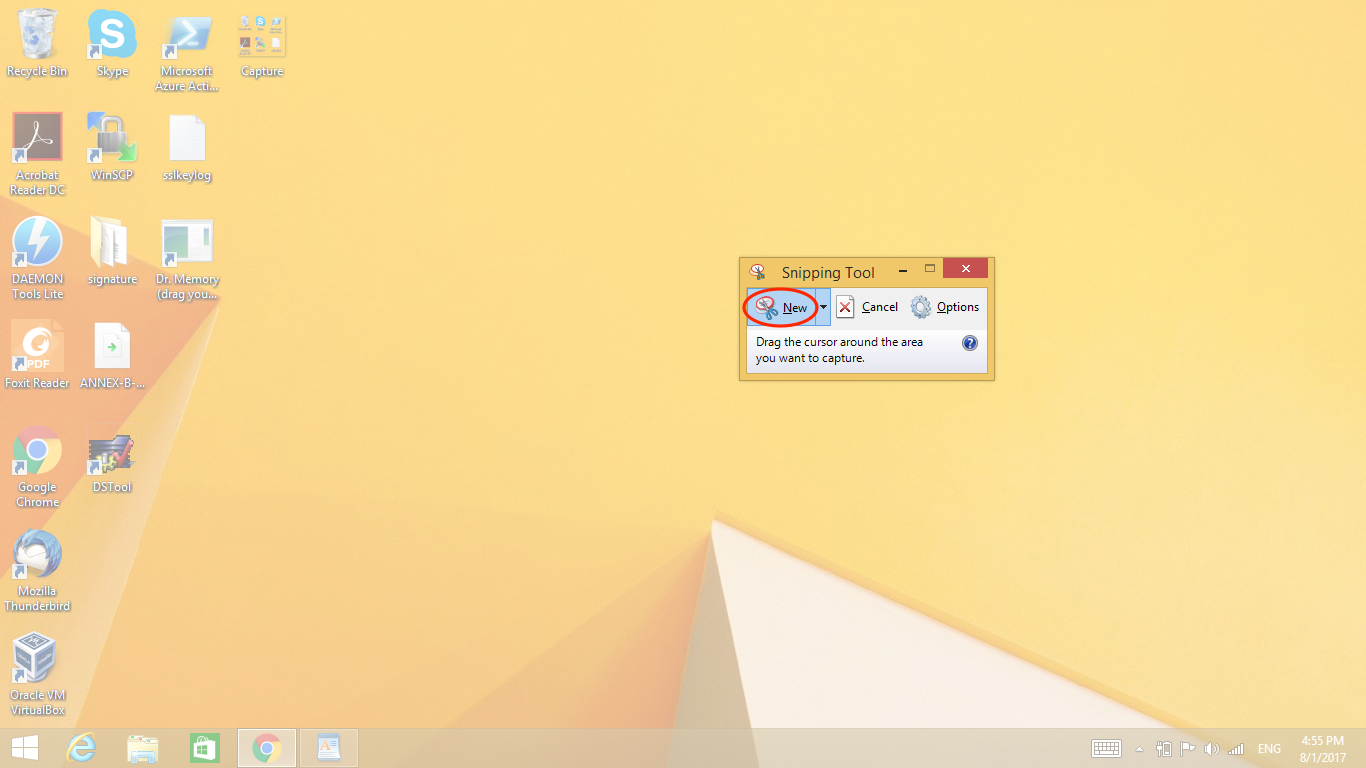
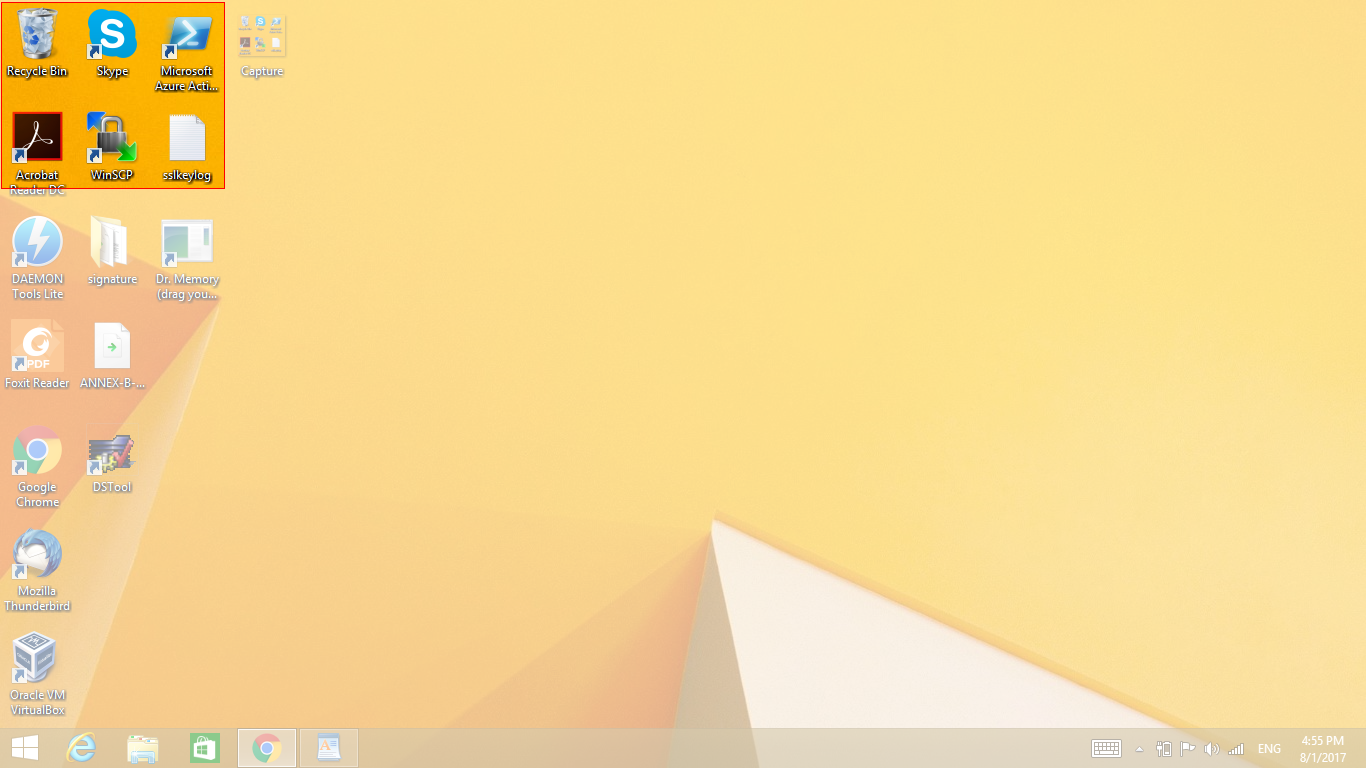
- Click on “New”. You will see your screen change. Click and drag over the area of the screen you would like to capture. When you are happy with the selected area, release to create the image.
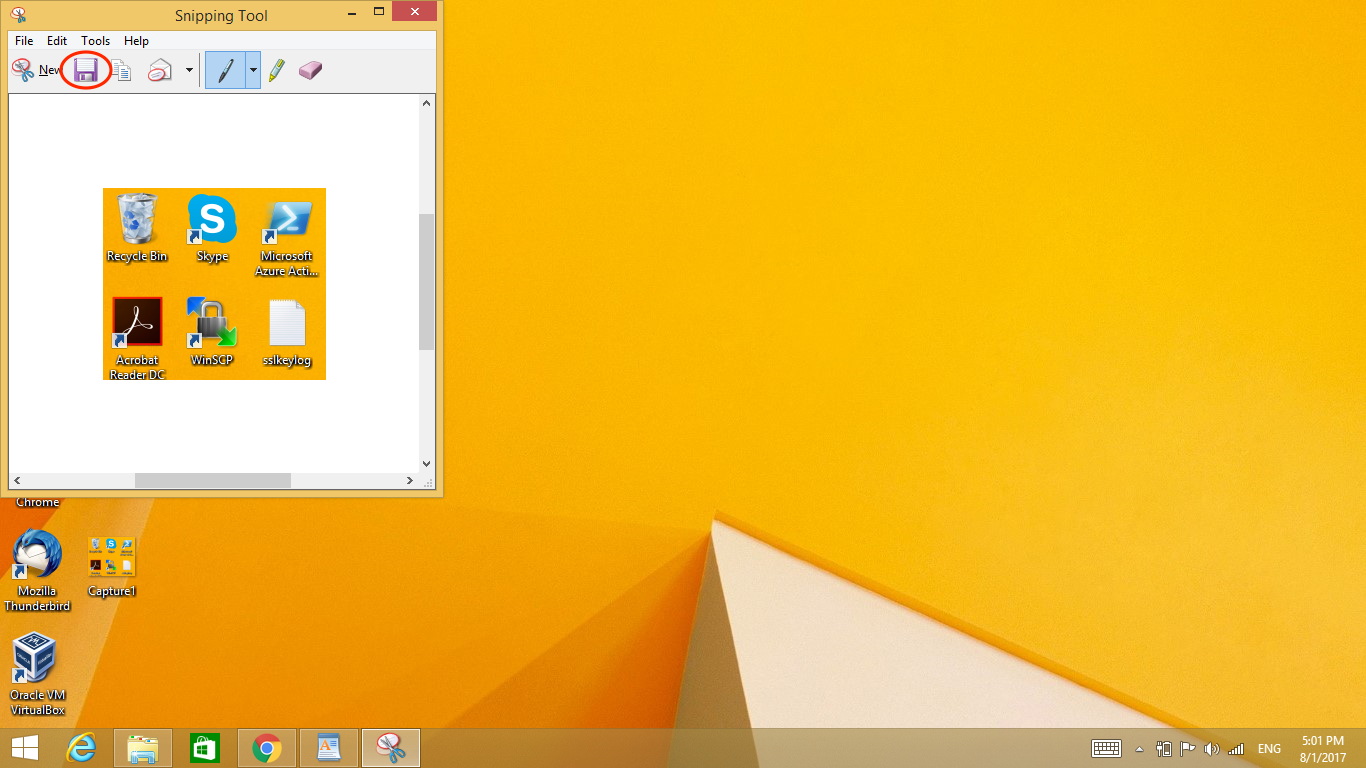
- The image has now popped up in a new window. Click on the “Save” icon at the top left corner of that window.
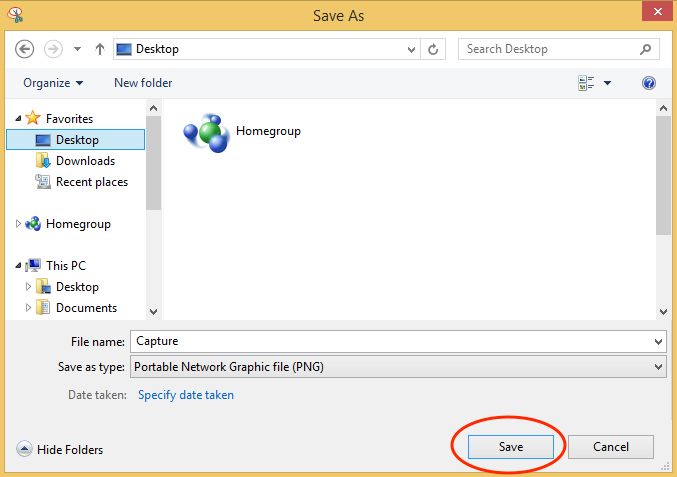
- Here you can save your file at the preferred location. Just navigate to a folder of your choice and click on the ‘Save’ button at the bottom right.
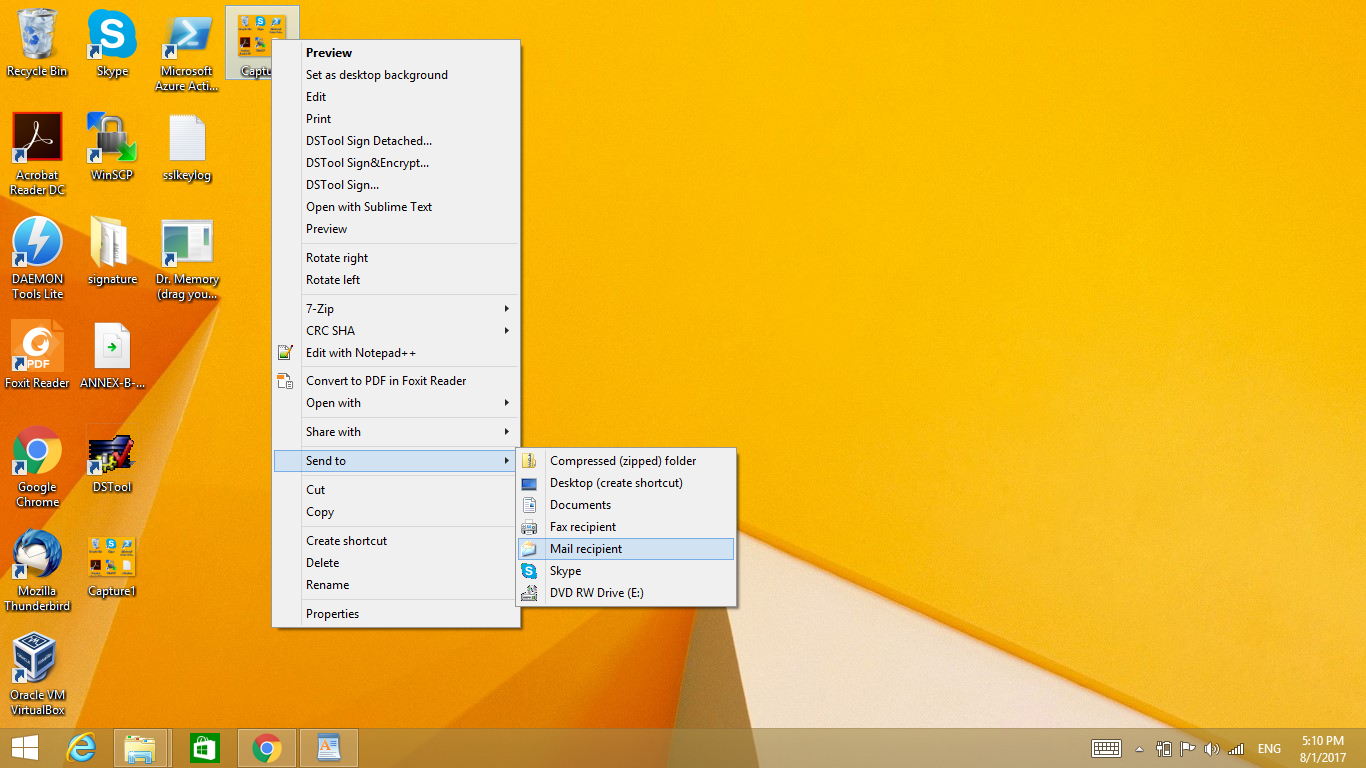
- Find your newly created screenshot in the File Explorer. Right-click on the file to send it via e-mail. Follow “Send to” > “Mail recipient”.
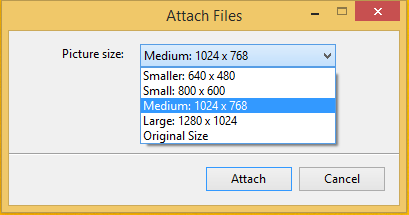
- Here you can choose the size of your file before attaching it to the e-mail. Click on “Attach” when you are ready.
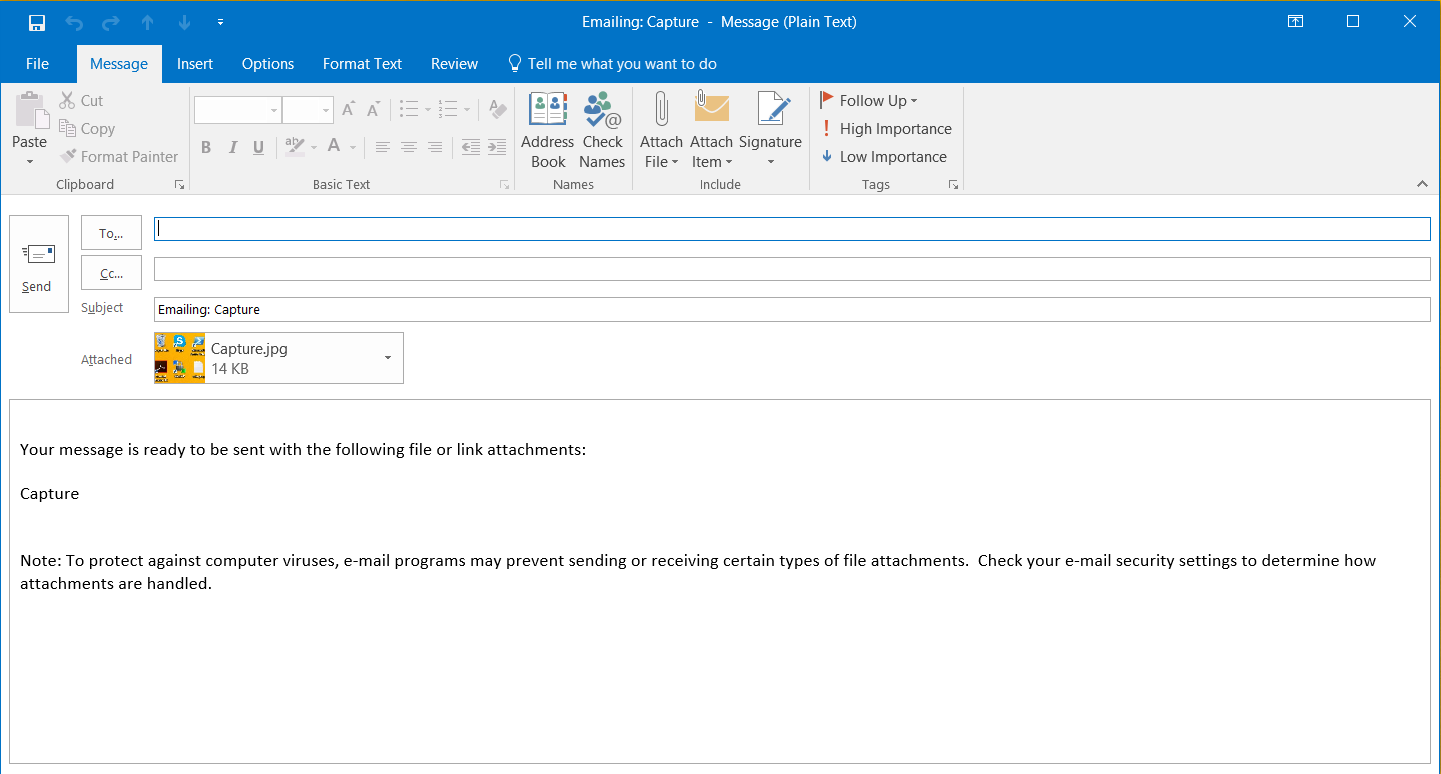
- A new e-mail window has been opened for you. Your file is now attached to your e-mail. You can add the recipient and the subject and send.
If you haven’t set up your mail client yet and you are unable to send your e-mail this way, you can log in to Webmail and send the file from there.