- Log in your Gmail account.
- After you are logged in your account, go to the upper right corner of your webmail and click on the gear wheel and choose “Settings”.
- From the control panel choose “Accounts and import”.
- Choose ‘Add a mail account’.
- A pop-up window will appear. Here you can add your other email address. Click “Next” to proceed.
- Choose “Import emails from my other account (POP3)” and then click “Next”.
- Fill in your username, password and your server information. Click “Add Account” when you are ready.
Check “Leave a copy of retrieved message on the server” if you still want to read your emails on our webmail.POP3: pop3.mailprotect.be (port:110; SSL port: 995)
- Your account was added. You will be asked if you want to be able to send mails using your new account. In this example: user1@dierckxen.be. This option can be changed afterwards. Click “Next” to proceed.

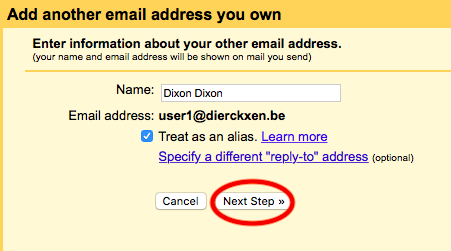
- Fill in your name to the new email address. Click on “Next step”.
- Fill in the settings for your SMTP server. Click on “Add account”.
SMTP: smtp-auth.mailprotect.be (port: 2525; SSL port: 465; TLS poort: 587)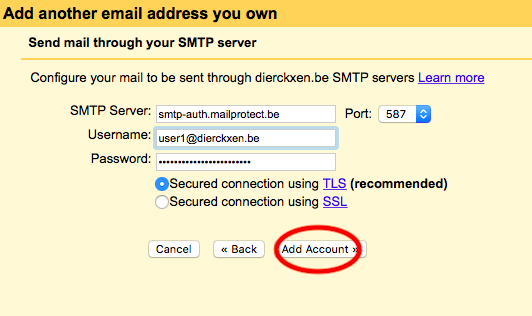
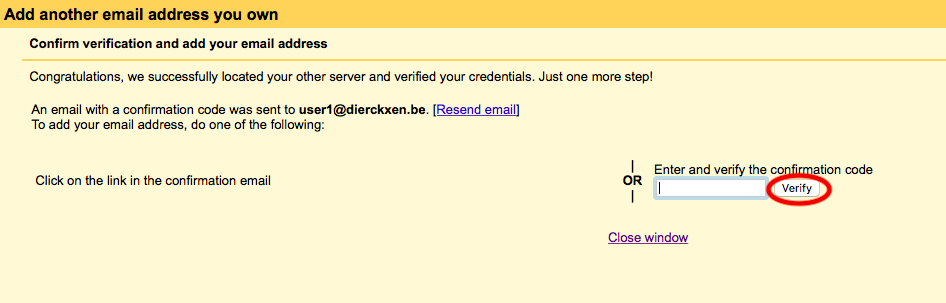
- You will be notified that your other server is successfully located. To confirm verification, you have to enter a verification code and click “Confirm” or click on the link in the confirmation email.
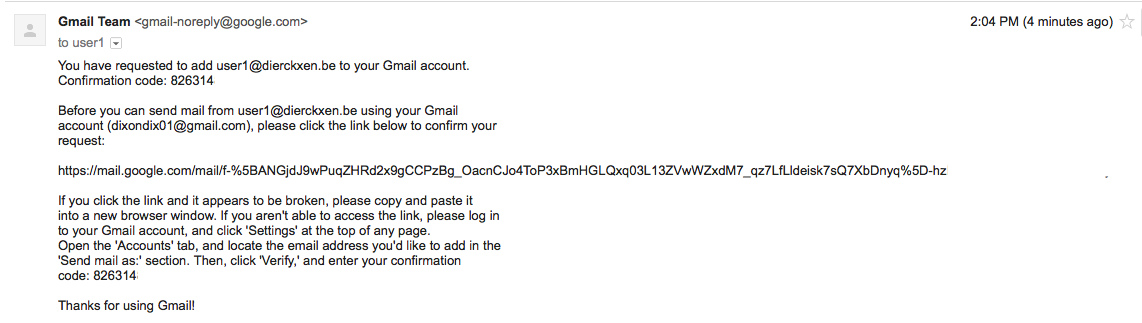
- Go back to your inbox where you will see your confirmation email. It may take a few minutes for the email to be sent.
- If you choose to enter the verification code, your mailbox will be added right away. If you choose to click, a new tab will appear and you need to click the “Confirm” button to proceed.
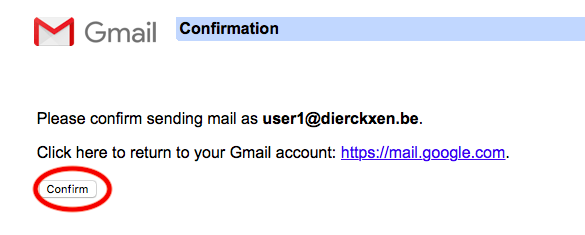
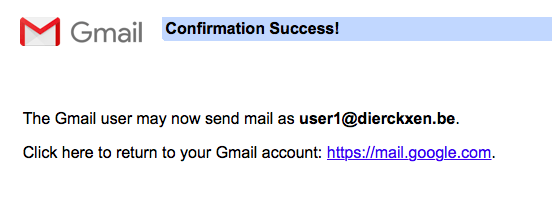
- Confirmation was successful! Click on the link to return to your Gmail account.
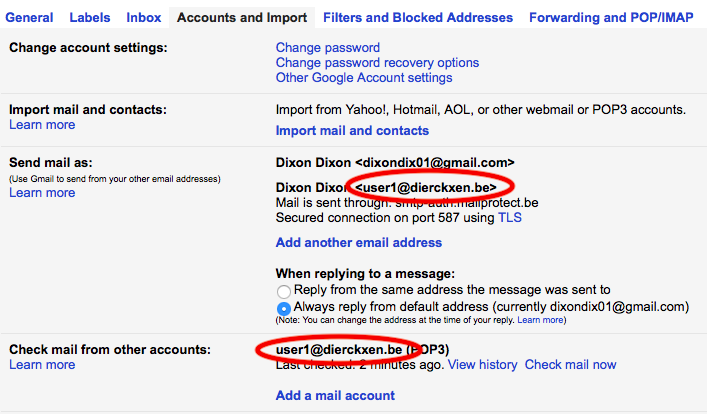
- In your account settings, you can see your added account: user1@dierckxen.be from which you can check and send mails.
How to configure my Basic mailbox in Gmail? (basic mail)
Updated on 27 October 2025
Need Support?Contact Support