You install an SSL certificate if you want to secure your website with HTTPS and a lock in the address bar. This way, you protect your visitors’ data. The secure connection of your SSL certificate prevents potential customers from receiving a warning message in their browser. In turn, customers will trust your website more.
The search engine optimisation of your website also improves. A web shop with an SSL connection will score higher in Google’s search results.
Generate free SSL
Thanks to Let’s Encrypt, you can create a free SSL certificate in a budget-friendly way. Let’s Encrypt is an international, independent and thus free certificate authority.
Because at Easyhost, online security is very important to us, SSL certificates from Let’s Encrypt are included by default in your hosting package. You do not have to do anything, we install it for you.
How do I install a free SSL on my hosting package?
No SSL or HTTPS activated on your hosting package yet? Then you just need to activate a free SSL via our control panel. No, you do not have to create an SSL certificate yourself. For our Easyhost customers, we do that all by ourselves.
Follow these steps in the My Easyhost to activate your free SSL:
- Go to “My products” > “Web hosting” > Your domain name.
- In the menu on the left, select “Websites & SSL”.
- Click on “Manage website” on the right and choose “SSL settings” in the dropdown.
- Click on “Enable Let’s Encrypt” and turn on “Forcing HTTPS”. This change can take up to 15 minutes. After that, your website will appear on HTTPS.
Tip: Is your website working on HTTPS, but your browser still marks it as not secure?
Then check for mixed content and remove if necessary.
If you are using WordPress, all you need to do is install and activate the Really Simple SSL plugin. This will solve the problem of mixed content.
Activate Let’s encrypt when your domain name does not point to your hosting package (advanced)
At Easyhost, you can activate Let’s encrypt for any website on your hosting package. Both the main website and subsites.
But you cannot activate Let’s Encrypt on an alias domain name of one of those websites. That’s a problem when the domain name of a website no longer points to that package. E.g. because you are no longer using that domain name or that it should still temporarily point to an old hosting (website).
In that case, if you still want your website to be accessible via a particular alias domain name with Let’s Encrypt activated, there is a workaround.
Follow these steps in My Easyhost:
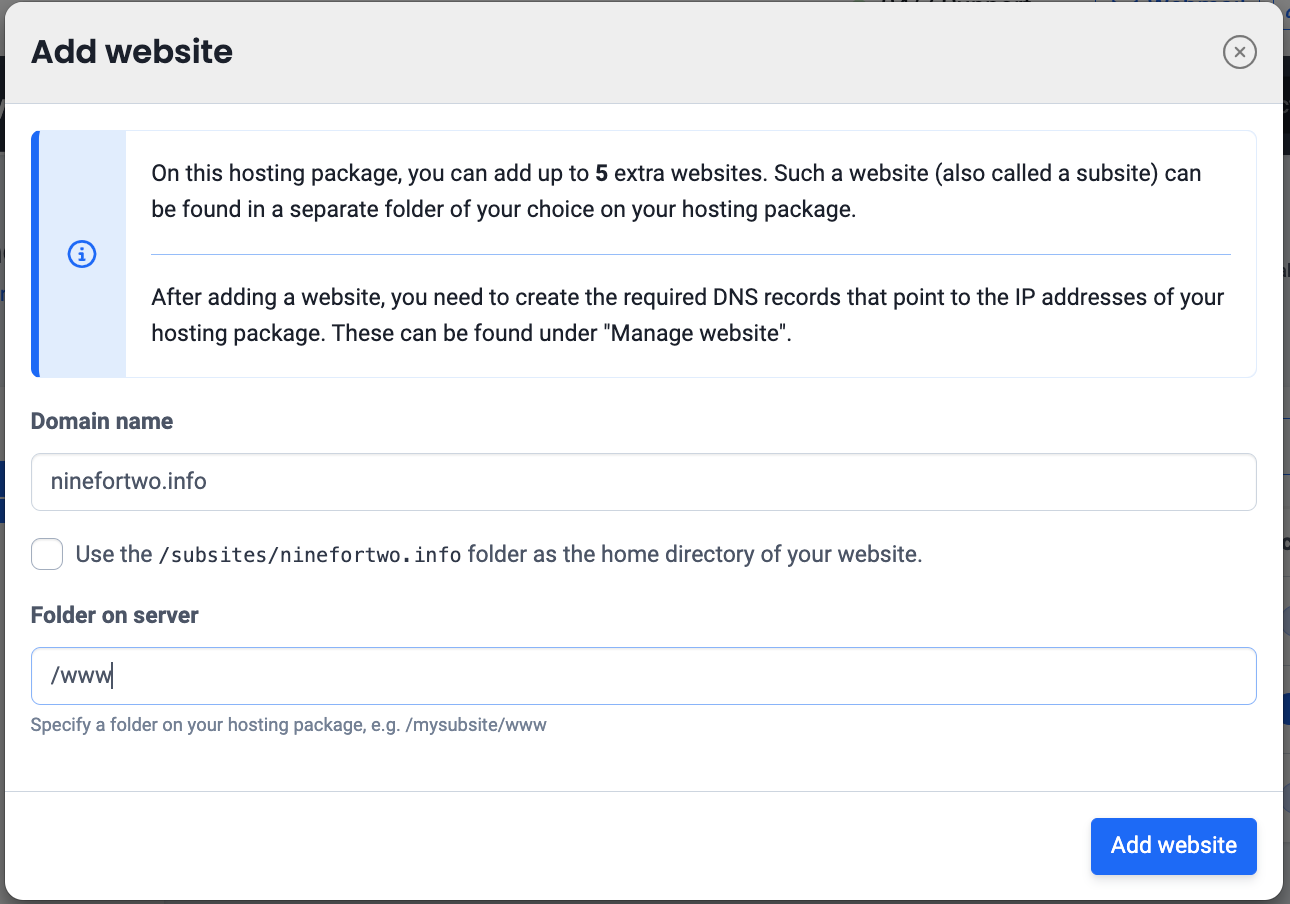
- Create an additional website on the hosting package your website is on. In our example, this is the hosting package ninefortwo.be.
- Uncheck the checkbox so that you can link the website to another folder.
- In the input field, enter the folder where the website originally resides. Usually this is the folder where the main website resides, namely “/www”.
- Your settings should look like this, see image. At the bottom, click “Add website” to create the website.
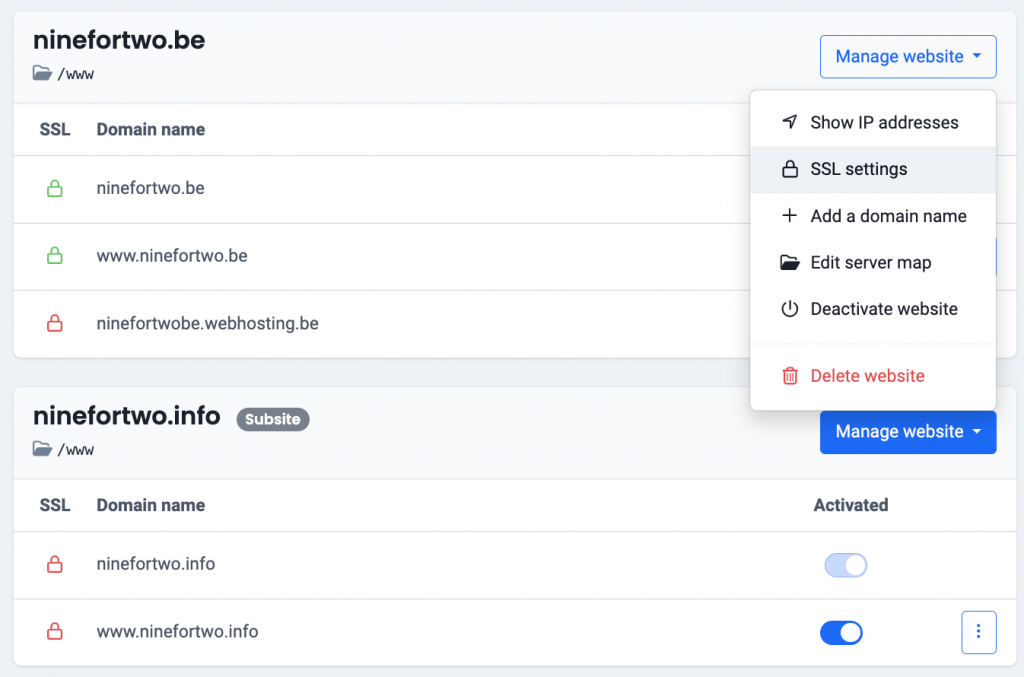
- Now click on “Manage website” by the new website and choose “SSL settings”, see image.
- Click on “Activate Let’s Encrypt” and tick “Force HTTPS”. This change can take up to 15 minutes. After that, you can test the new website with HTTPS using the normal domain name (in our case, ninefortwo.be).